
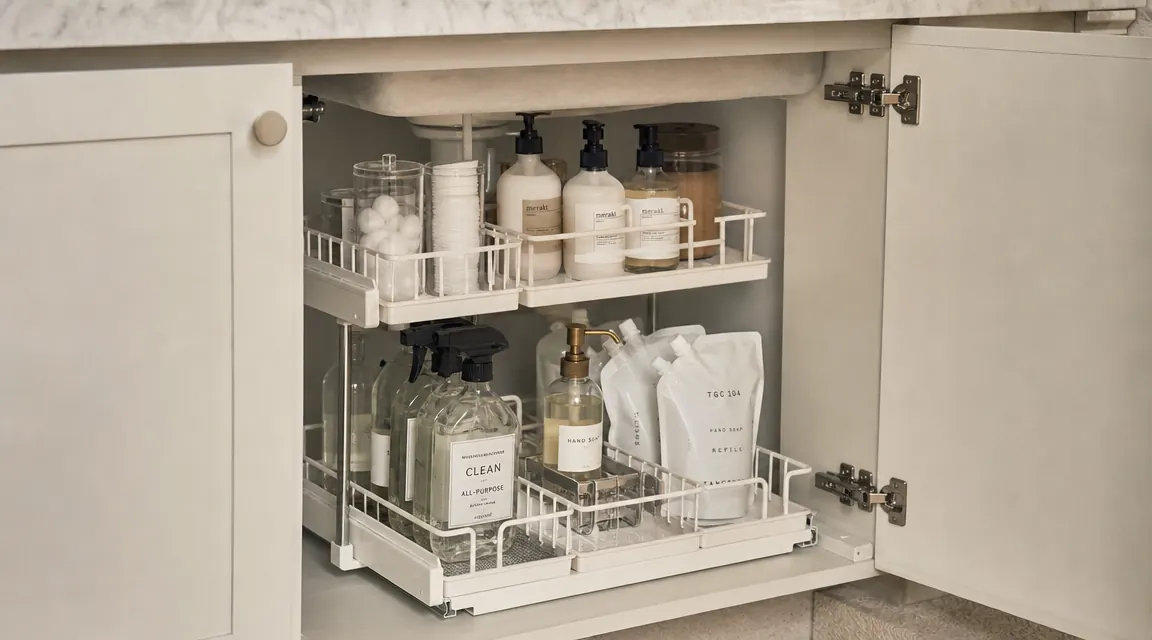
The cabinet under the bathroom sink is where organization goes to die. Everything gets shoved in there because there is nowhere else to put it, and within three weeks you are fishing through a pile of half-empty shampoo bottles to find the backup toothpaste you bought two months ago. I have organized this exact space in five different apartments. Every single time, the problem was not too much stuff. It was zero structure. No shelving, no zones, and a plumbing pipe cutting the usable width down to about 14 inches on each side.
This guide walks you through the whole project in order. Plan for about two to three hours on a Saturday morning. You will empty the cabinet, take three measurements, install a pull-out organizer that clears the plumbing, categorize what goes back in, and end up with a cabinet you can actually navigate. The recommended tool for the job is the PXRACK 2-tier pull-out under-sink organizer, which comes as a 2-pack with adjustable height shelves designed to straddle the drain pipe.
If you are going to do this once, use a pull-out organizer that fits around the pipe
The PXRACK under-sink organizer comes as a 2-pack with five height settings per shelf. Both units together are rated 4.7 stars from 1,785 reviews. Check today's price before you start the project so it arrives in time.
Amazon Check Today's Price on Amazon →Step 1: Empty the Cabinet Completely and Sort on the Floor
Pull everything out and put it on a towel on the bathroom floor. I mean everything, including the stuff that has been living in the back left corner since you moved in. Wipe down the cabinet floor with a damp cloth and let it dry for five minutes. While it is drying, sort the pile into four groups: daily use items you reach for every morning, backup stock you bought in bulk, cleaning supplies, and the third group nobody likes to admit exists, which is expired or empty product you have been keeping for no reason.
Throw out the expired items now, before you start measuring. This step is non-negotiable. Every time I skip it, I end up installing an organizer perfectly and then filling it back up with three-year-old nail polish remover. Estimate what is left after purging. Most people find they had about 40 percent more stuff than they needed to keep.
One practical sorting move: put the daily-use items in a separate pile near the sink. Those go back in at the end in the most accessible spot. Backup stock and cleaning supplies go in the back half of the organizer or the lower tier. The goal is that Monday morning you open the door and reach straight for your face wash without moving anything.
Step 2: Measure Three Things Before You Order or Install Anything
Grab a tape measure and write down three numbers on your phone: cabinet interior width, interior depth front-to-back, and the height clearance from the cabinet floor to the underside of the sink basin. Width is the one most people miss. The PXRACK large units measure roughly 13.4 inches wide each. Two of them side by side need around 27 inches of clear cabinet width, or one per side if the plumbing pipe runs down the center.
The adjustable height feature on the PXRACK matters here. The shelf posts adjust across five height positions, which lets you set the upper tier high enough to clear the drain pipe. Measure from the cabinet floor up to the bottom of the drain line, then add about an inch. That is the minimum height setting you need. If your drain sits unusually high, above 11 inches from the floor, read the product dimensions carefully before installing. Most standard vanities sit in the 9 to 12 inch clearance range, which the PXRACK is built to handle.
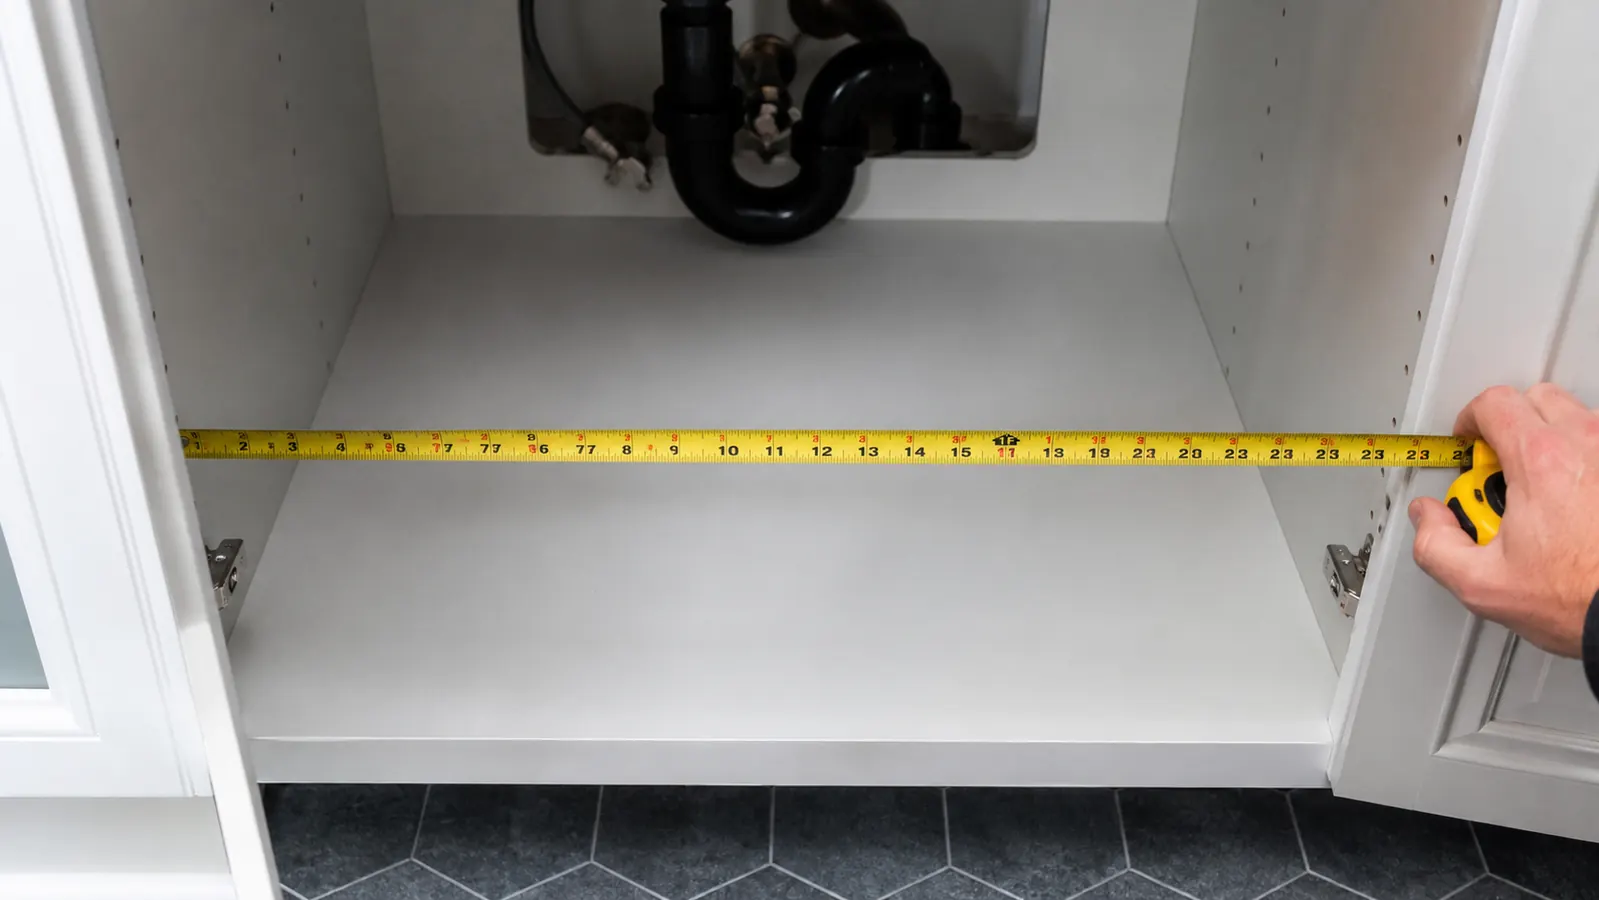
Depth is worth checking too. The PXRACK slides in on metal rails and pulls fully forward, so you want at least 16 inches front-to-back for full pull-out travel. Most bathroom vanity cabinets are 18 to 21 inches deep, so this is rarely a problem. But if you are working with a 12-inch pedestal-sink cabinet, this organizer is not the right fit and a set of small baskets stacked on a static riser will work better.
Step 3: Install the PXRACK Pull-Out Organizers
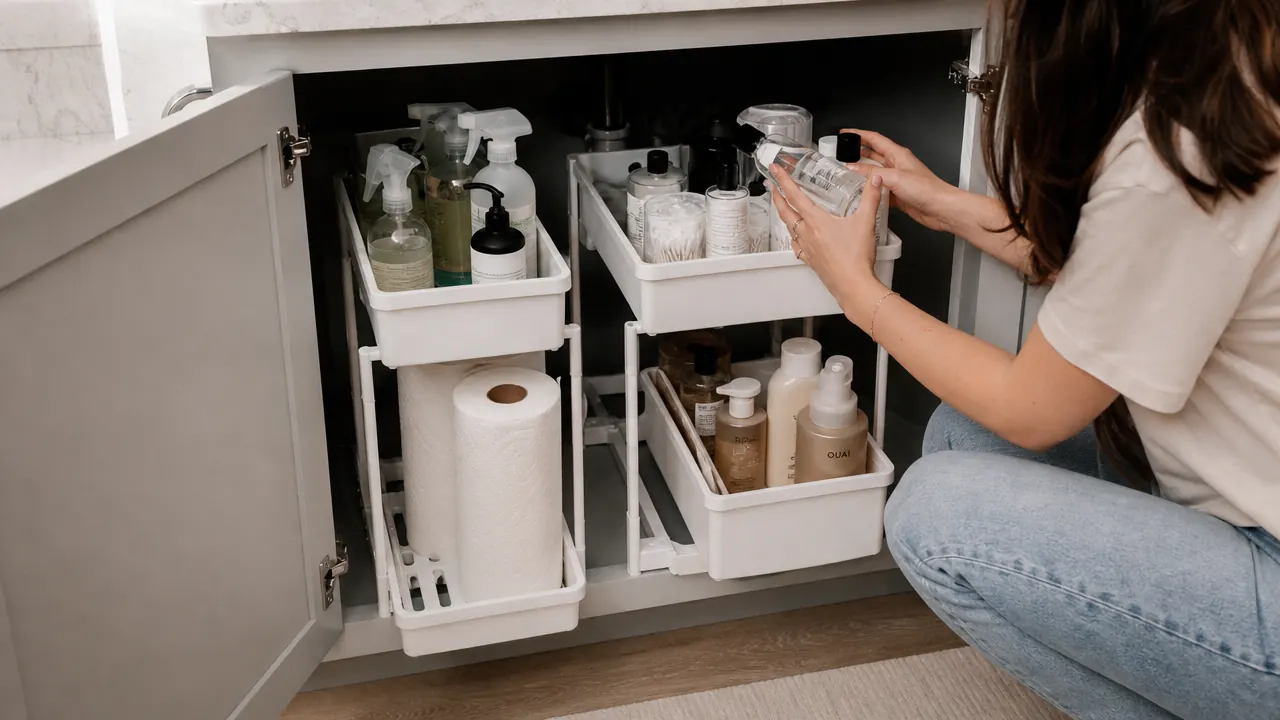
Take both PXRACK units out of the box and set the shelf height before placing them in the cabinet. The height adjustment uses a pin-and-slot system on each corner post. Press the pin, slide the shelf to the appropriate slot, and release. No tools required. I set mine with the bottom tier at 4 inches and the top tier at 8 inches, which cleared a standard P-trap drain configuration with about 2 inches of clearance above the pipe.
Place both units in the cabinet. Most people put one on each side of the center drain pipe. The suction cup feet keep the units from sliding when you pull them out. Press each foot firmly down on the cabinet floor. Give the front edge a tug to confirm it grips. If your cabinet floor has a texture or a slight slope, press each cup individually and hold for five seconds. On smooth MDF cabinet floors the grip is immediate. On textured vinyl the cups take a bit longer to seat.
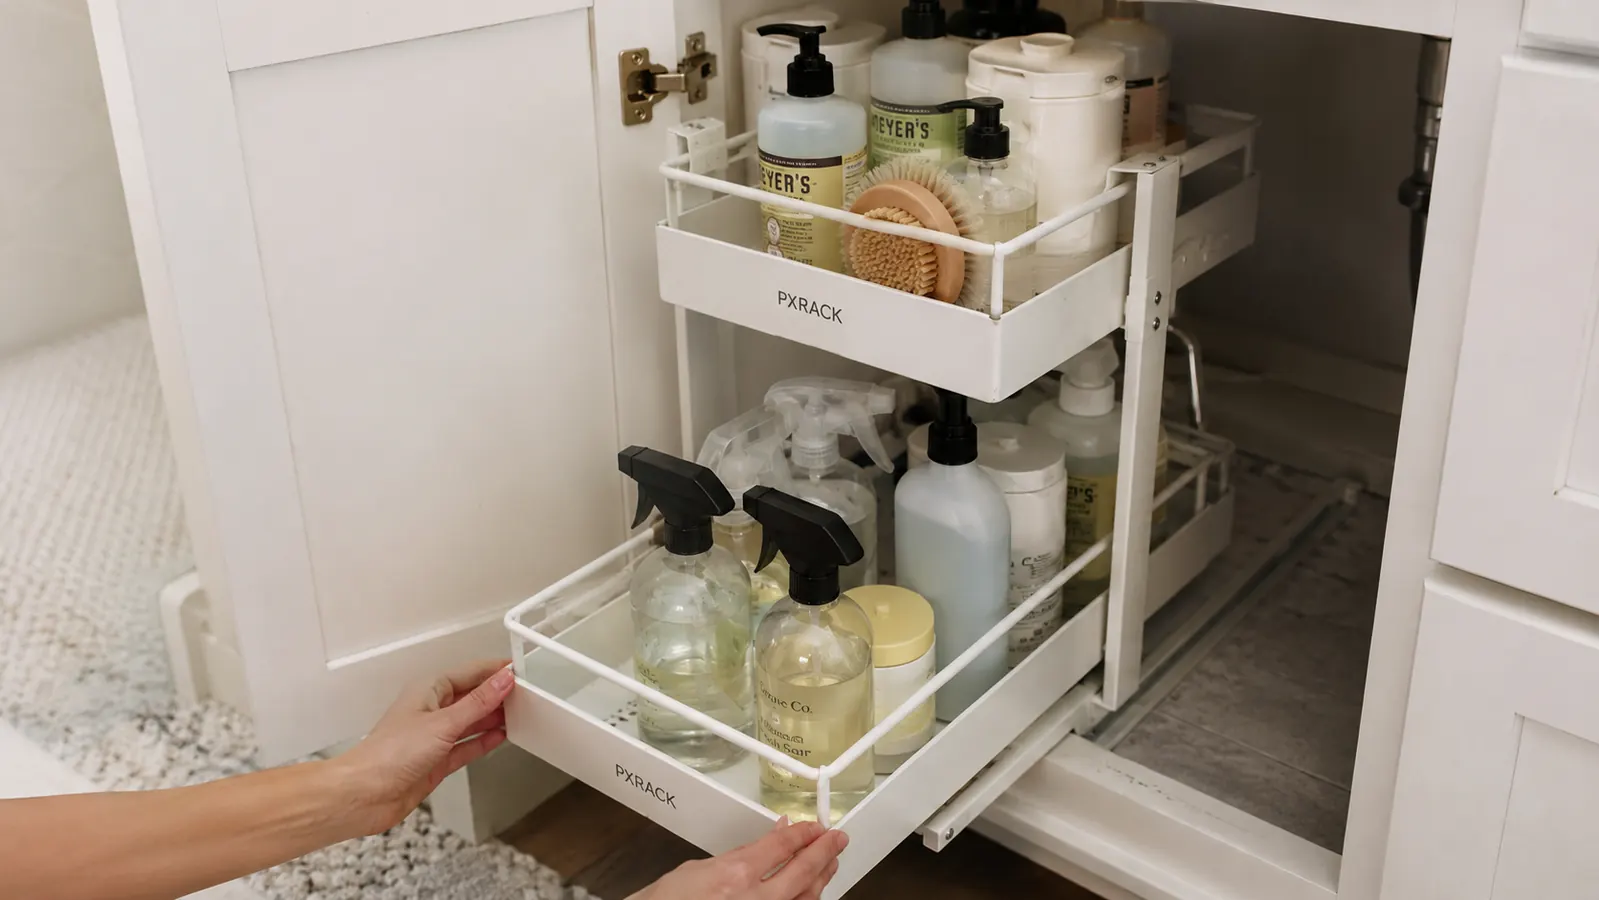
Slide each unit in and out three times to confirm the rails move smoothly and do not catch on the cabinet door frame. Check that the door closes without pressing against the front of the organizer. If the door catches, push the entire unit back half an inch. The pull-out travel is long enough that you still get full access.
Step 4: Load the Organizers by Zone and Category
Now load everything back in using a two-zone system. Zone one is your daily driver: the items you touch every single morning. In my bathroom that is face wash, moisturizer, and the backup bar of soap. Those go on the upper tier of the unit closest to where you stand at the sink. Zone two is support stock: the extra shampoo bottle, the replacement razor cartridges, the cleaning spray. Those go on the lower tier or on the back unit if you installed two.
Group by category within each zone. Cleaning supplies stay together. Hair tools accessories stay together. Skincare stays together. The rule is: if you have to move something to get to something else, it is in the wrong zone. Pull-out organizers only work if the loading logic makes sense, because the whole advantage of a pull-out is being able to see and reach every item without unpacking the front row.
Pull-out organizers only fix the access problem. The sorting work you do in step one is what makes the space stay organized three months from now.
For cleaning supplies specifically, I keep them on the left unit's lower tier with the spray nozzles facing forward. That way I can grab the toilet cleaner without pulling the unit all the way out. Tall bottles go toward the back of the tier; short items go at the front. If you have a bottle that is too tall to fit under the upper shelf, place it outside the organizer on the right side of the cabinet if there is room, or store it in a different cabinet. Forcing a tall item into the organizer usually means bumping the shelf height up in a way that sacrifices the pipe clearance you set in step three.
Step 5: Set Up a Maintenance System So It Stays Organized
The most common reason an organized cabinet reverts to chaos is a missing rule for what happens when you bring new product home. Before you close the cabinet door today, set two rules. First: nothing new goes in until you pull the unit out and confirm there is space for it. Second: when a backup item moves from the support tier to daily use, the old daily-use item either gets thrown out or consolidated. Two minute check, once a week, during the time you are already standing at the sink.
Once a month, pull both units all the way out and wipe down the metal frames. The PXRACK frame is thickened metal with a powder coat, so it does not rust from contact with damp spray bottles. But product drips and grime do accumulate on the rails over time. A damp cloth every four weeks keeps the pull-out action smooth. This is especially true in humid bathrooms without great ventilation.
What Else Helps Under the Bathroom Sink
A pull-out organizer solves the access and structure problem, but a few extra items make the system more complete. A set of small bins or baskets placed on the organizer tiers helps keep loose items from shifting when you pull the unit out. I use short open-top bins about 4 inches wide for cotton rounds, hair ties, and travel-size products. They sit on the organizer tier like drawers-within-a-drawer and prevent the pile-up that happens with small items.
A second option worth considering is a door-mounted organizer for the inside cabinet door. If your vanity door has enough clearance between the door and the unit when closed, a small over-door rack adds a third tier of accessible space for frequently-used lightweight items. Floss picks, nail files, travel mouthwash, and Q-tips are good candidates. This is renter-friendly as long as you choose a tension-mounted or hook-style rack that does not require drilling.
If you have two sinks and two cabinets, buy two 2-packs of the PXRACK organizer and do both cabinets on the same afternoon. The project time per cabinet is about 45 minutes once you have done it once. The first cabinet is the learning curve. The second goes fast.
For a deeper look at how the PXRACK organizer performs over time, including how the height adjustment holds up after dozens of pulls and what happens to the suction cups on different cabinet floor materials, see my full review at the link below. And if you are still deciding whether a pull-out organizer is worth the cost compared to a simple static shelf, the comparison guide covers that question in detail.
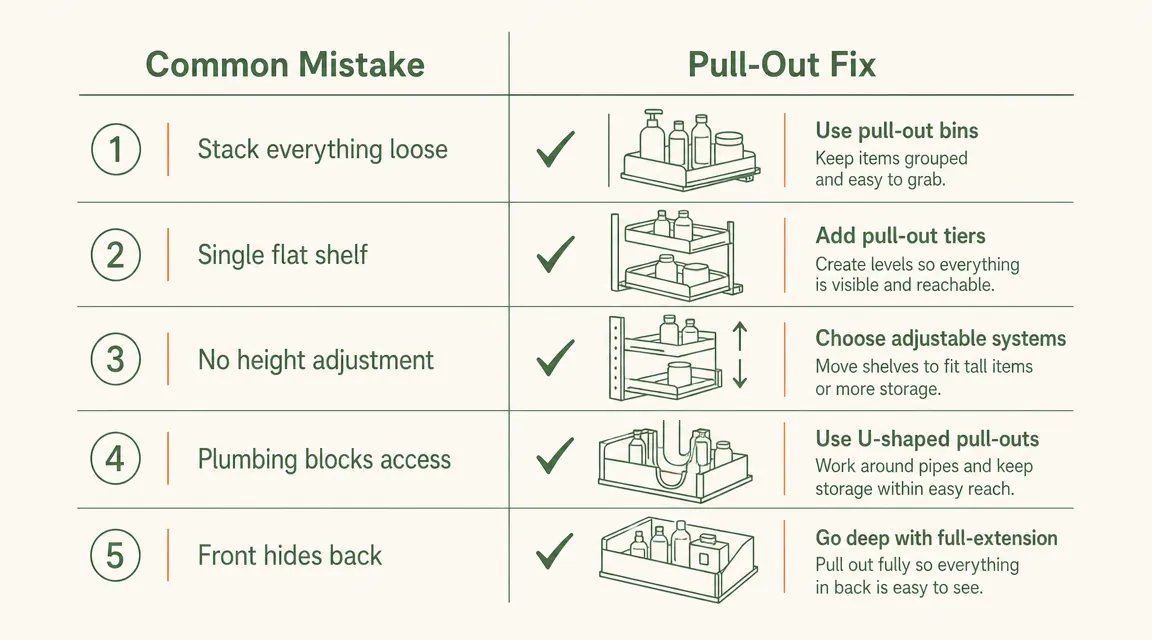
The short answer: if the plumbing pipe takes up any usable width, and it almost always does in a standard bathroom vanity, a pull-out organizer with height-adjustable tiers is the only configuration that actually uses the full cabinet depth. A static shelf just sits in front of the pipe and leaves the back half of the cabinet unreachable. That is not a storage problem you can organize your way out of with baskets alone.
You already did the hard work. Pick up the organizer before the pile comes back.
The PXRACK 2-pack comes with both units, suction cup feet, and five height settings per shelf. No drilling, no tools. Rated 4.7 stars across 1,785 reviews. Ships fast on Prime.
Amazon Check Today's Price on Amazon →